


Thermalright CPU Contact Frame for LGA 1700 Retrofit Kit, 1700 Bracket Intel 12th/13th/14th Generation Anti-Bending Buckle
4.000 OMR
Available in stock
-
ompatible with Intel 12th, 13th, and 14th Gen CPUs (LGA 1700 socket).
-
Replaces stock ILM to prevent CPU bending and uneven pressure.
-
Improves cooler contact for better thermal performance.
-
Made of durable metal for long-lasting stability.
-
Easy installation with included tools.
People Also Viewed
-
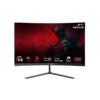 GAMEON GOC24F120VA Pro Series 24" FHD Curved Gaming Monitor | 120Hz | 1ms MPRT | HDMI 2.1 | VA Panel | PS5 Support | Black
34.900 OMR
GAMEON GOC24F120VA Pro Series 24" FHD Curved Gaming Monitor | 120Hz | 1ms MPRT | HDMI 2.1 | VA Panel | PS5 Support | Black
34.900 OMR
-
 PNY Performance DDR4 3200MHz Desktop Memory | UDIMM RAM | High-Speed PC Upgrade
9.000 OMR – 14.000 OMR
PNY Performance DDR4 3200MHz Desktop Memory | UDIMM RAM | High-Speed PC Upgrade
9.000 OMR – 14.000 OMR
-
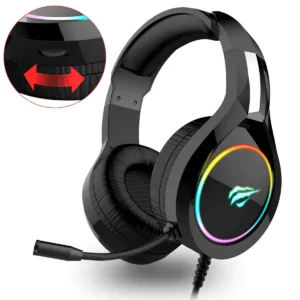
 HyperX Cloud Alpha - Gaming Headset OPEN BOX
17.900 OMR
HyperX Cloud Alpha - Gaming Headset OPEN BOX
17.900 OMR
-
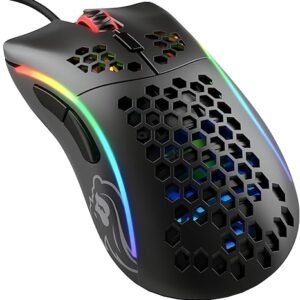
 GAMEON CYPHER XL All-In-One Gaming Bundle (Keyboard, Headset, Mouse & Mousepad)
12.500 OMR
GAMEON CYPHER XL All-In-One Gaming Bundle (Keyboard, Headset, Mouse & Mousepad)
12.500 OMR
-
 GAMEON GO-CYPHERW-XL-W Gaming Bundle | Keyboard + Headset + Mouse + XL Mousepad | 4-in-1 Combo
12.900 OMR
GAMEON GO-CYPHERW-XL-W Gaming Bundle | Keyboard + Headset + Mouse + XL Mousepad | 4-in-1 Combo
12.900 OMR
Description
-
ntel 12thCPU Bending Corrector Frame:
Specifications: 54mmx70mmx6mm
Material: aluminum alloy
Weight: main body 20g | overall 55g
Accessories: L-shaped screwdriver X1
TF7 1Gfeature:
1. Compared with other similar products, this product adopts four-sided flat pressure instead of multi-point pressure, precise positioning. Avoid capacitors, which is good for CPU fixation
2. The contact surface with the motherboard is a flat bottom, and the original LOTES insulation protection pads of the same specification are used to reduce the pressure on the motherboard and further reduce signal interference.
3. The metal side is raised to reduce signal interference on the motherboard side
4. Made of all-aluminum CNC precision anode sandblasting, multi-color optional**This product only provides support for intel 12th generation CPU, the motherboard CPU socket is LGA1700 chipset is H610 B660 Z690 series
Installation process:
1. Place the motherboard horizontally on the desktop and open the CPU clip
2. Use the included T20 Torx screwdriver to remove the upper part, and put the lower fastener aside
3. Put the CPU into the socket
4. Cover the improved buckle on the top cover of the CPU and move it slightly until it clicks into place
5. Tighten the screws in half a circle on the opposite corners. Each screw takes turns in half a circle and a half circle in the diagonal order until the screw is on. , will put pressure on the CPU unevenly
Reviews (0)
Similar Products
-
Out Of Stock


 No products in the cart.
Reviews
There are no reviews yet.